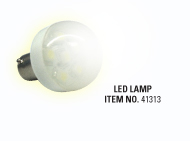
Changing Bingo Flashboard Lightbulbs
Caution: Make sure the flashboard power is off when installing new flashboard bulbs
For additional assistance, please call our Technical Assistance Center at (800) 277.6214, 7 days per week, 8am-midnight EST
-
Metal Fabricated Style Flashboards
Low Side Light Bulbs:
Remove three Phillips screws from the front of the power pack panel, swing the hinged panel open to the left and slide out the acrylic panel approximately six inches. Firmly grasp the acrylic panel in the center of both ends and gently bow out of the metal frame. (Refer to drawing A) Change the light bulb(s) as necessary.
High Side Light Bulbs:
Remove the metal trim from the right end of the flashboard by removing the five Phillips screws. Gently slide the acrylic panel to the right. (Refer to drawing A) Change the light bulb(s) as necessary.
-
Game Pattern IndicatorRemove three Phillips screws from the front of the power pack panel and swing the hinged panel to the left. Gently slide the acrylic panel out to the right. (Refer to drawing A) Change the light bulb(s) as necessary.
![flashboardA[1]](http://www.rockymountainbingo.com/wp-content/uploads/2013/12/flashboardA1.gif)
-
Access and Brass Anodized Aluminum Extruded Flashboards
2″ and 4″ Large Numbered Flashboards:
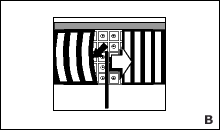
Remove the plastic retaining strip between the low and high side acrylic. This is accomplished by gently pushing in the low side acrylic panel while grasping the retaining strip and gently pulling it out and to the right. (Refer to drawing B) Once the strip is removed, slide the acrylic panels to gain access to the light bulbs needing replacement. (Refer to drawing C)
Change the light bulb(s) as necessary. Slide the acrylic panels back to their home position. Re-insert the retaining strip.
8″ and 12″ Large Numbered Flashboards:
Open individual acrylic panels by locating the two 1/4 turn fasteners for each panel and twisting each a 1/4 turn counter-clockwise while gently pushing in. Note: Power Pack/Game Indicator sections require the use of a Phillips screwdriver. (Refer to drawing D)
Gently open the acrylic panel allowing the Velcro tabs to release. Change the light bulb(s) as necessary. Close the acrylic panel and apply gentle pressure to lock the Velcro tabs. Lock the acrylic panel in place by gently pushing in the 1/4 turn fastener, compressing the spring and twisting 1/4 turn clockwise.


